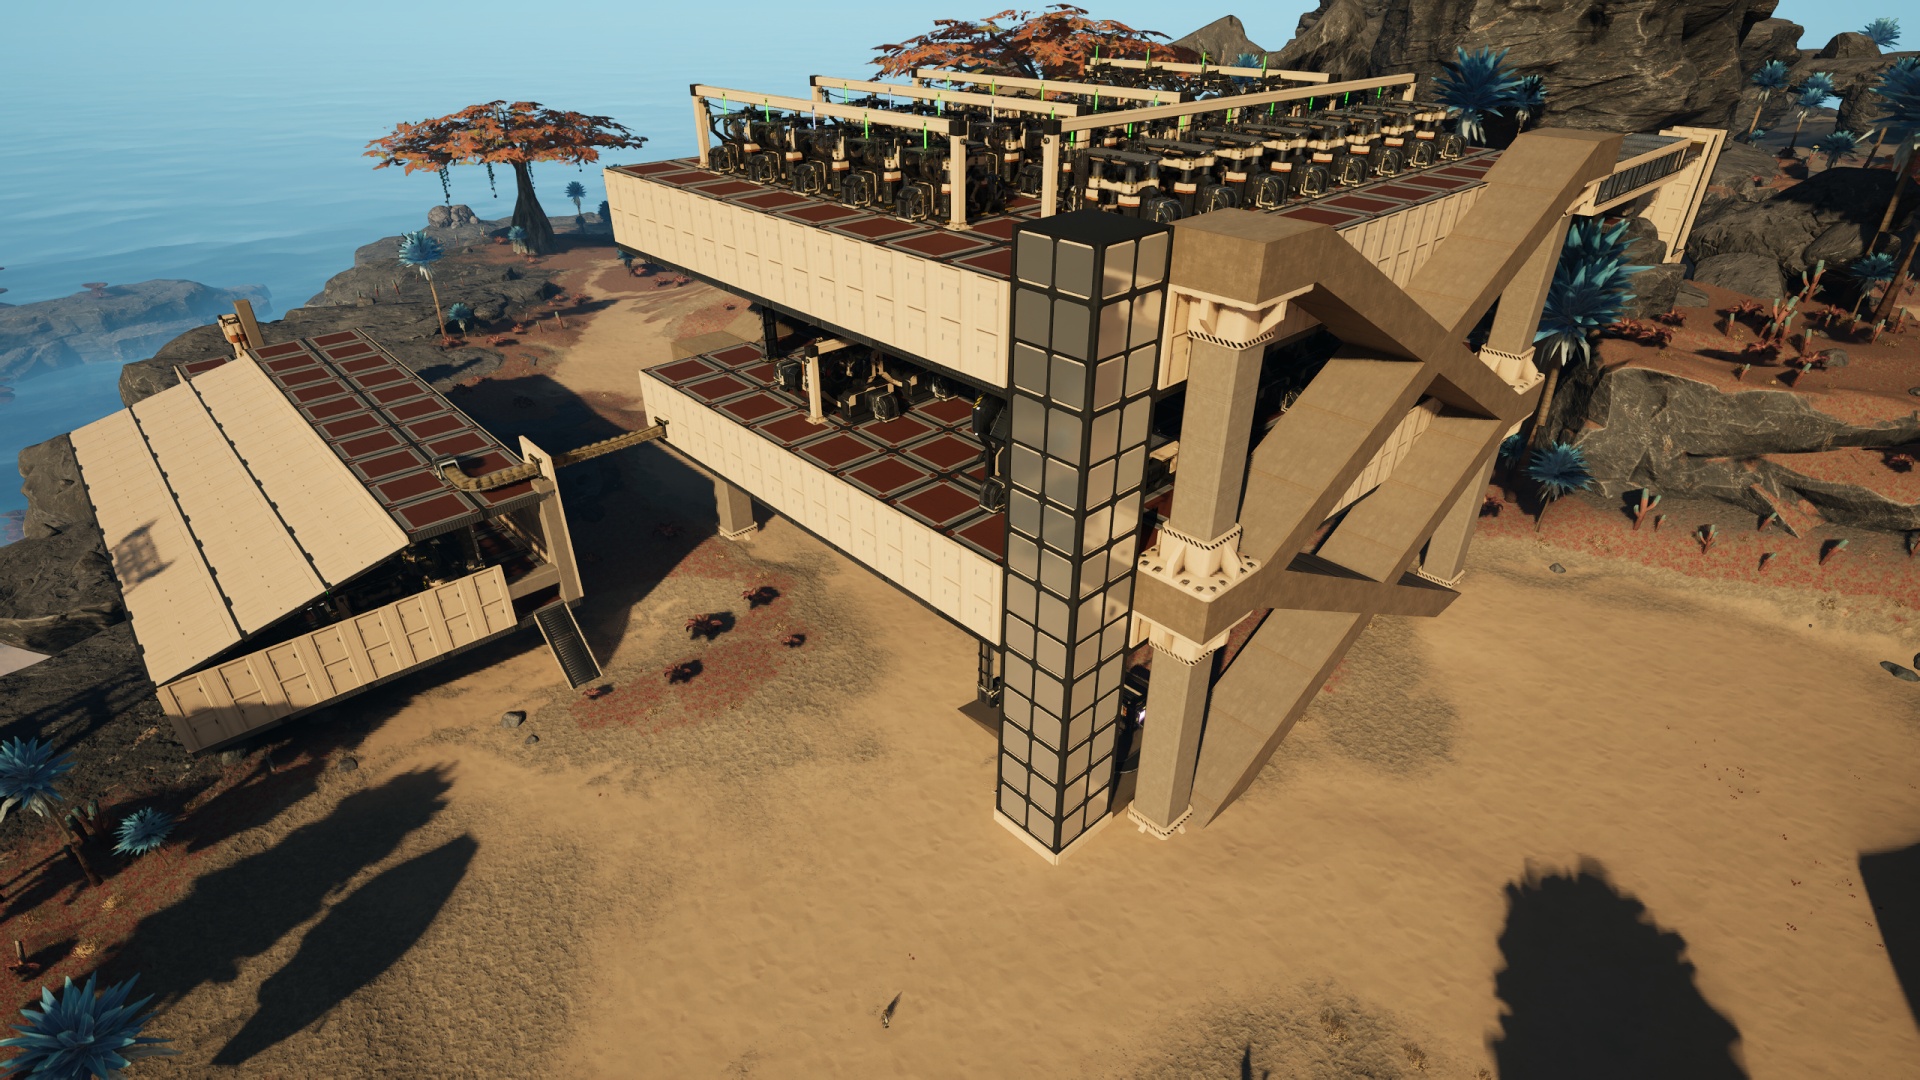
It’s only taken me a few years of playing this game but I finally accomplished one of my goals: Making a big factory that’s fully walkable. No jumping or crouch-sliding is required to navigate my new Heavy Modular Frame production site.
To aid navigation, this factory even includes an elevator. Ooooh, neat!
I set some very specific guidelines for this build, and I held to them even better than I did for the Computers site:
- Fully walkable machine floors – Absolutely no conveyor belts run at the machinery levels in the main building (not so for the Concrete and Iron Ingot supply outbuildings) and production lines are spaced such that every part of the factory floor is easily accessible.
- Enough room around the edges for decorative work – This mostly just means that I avoided cramming machines up against the outer walls.
- All belts and power cables hidden away in logistics floors – Other than the last-meter cables required to, you know, power the machines I was able to avoid any dangling cables, even between the production lines and the wall (where I’d normally site the incoming power plugs).
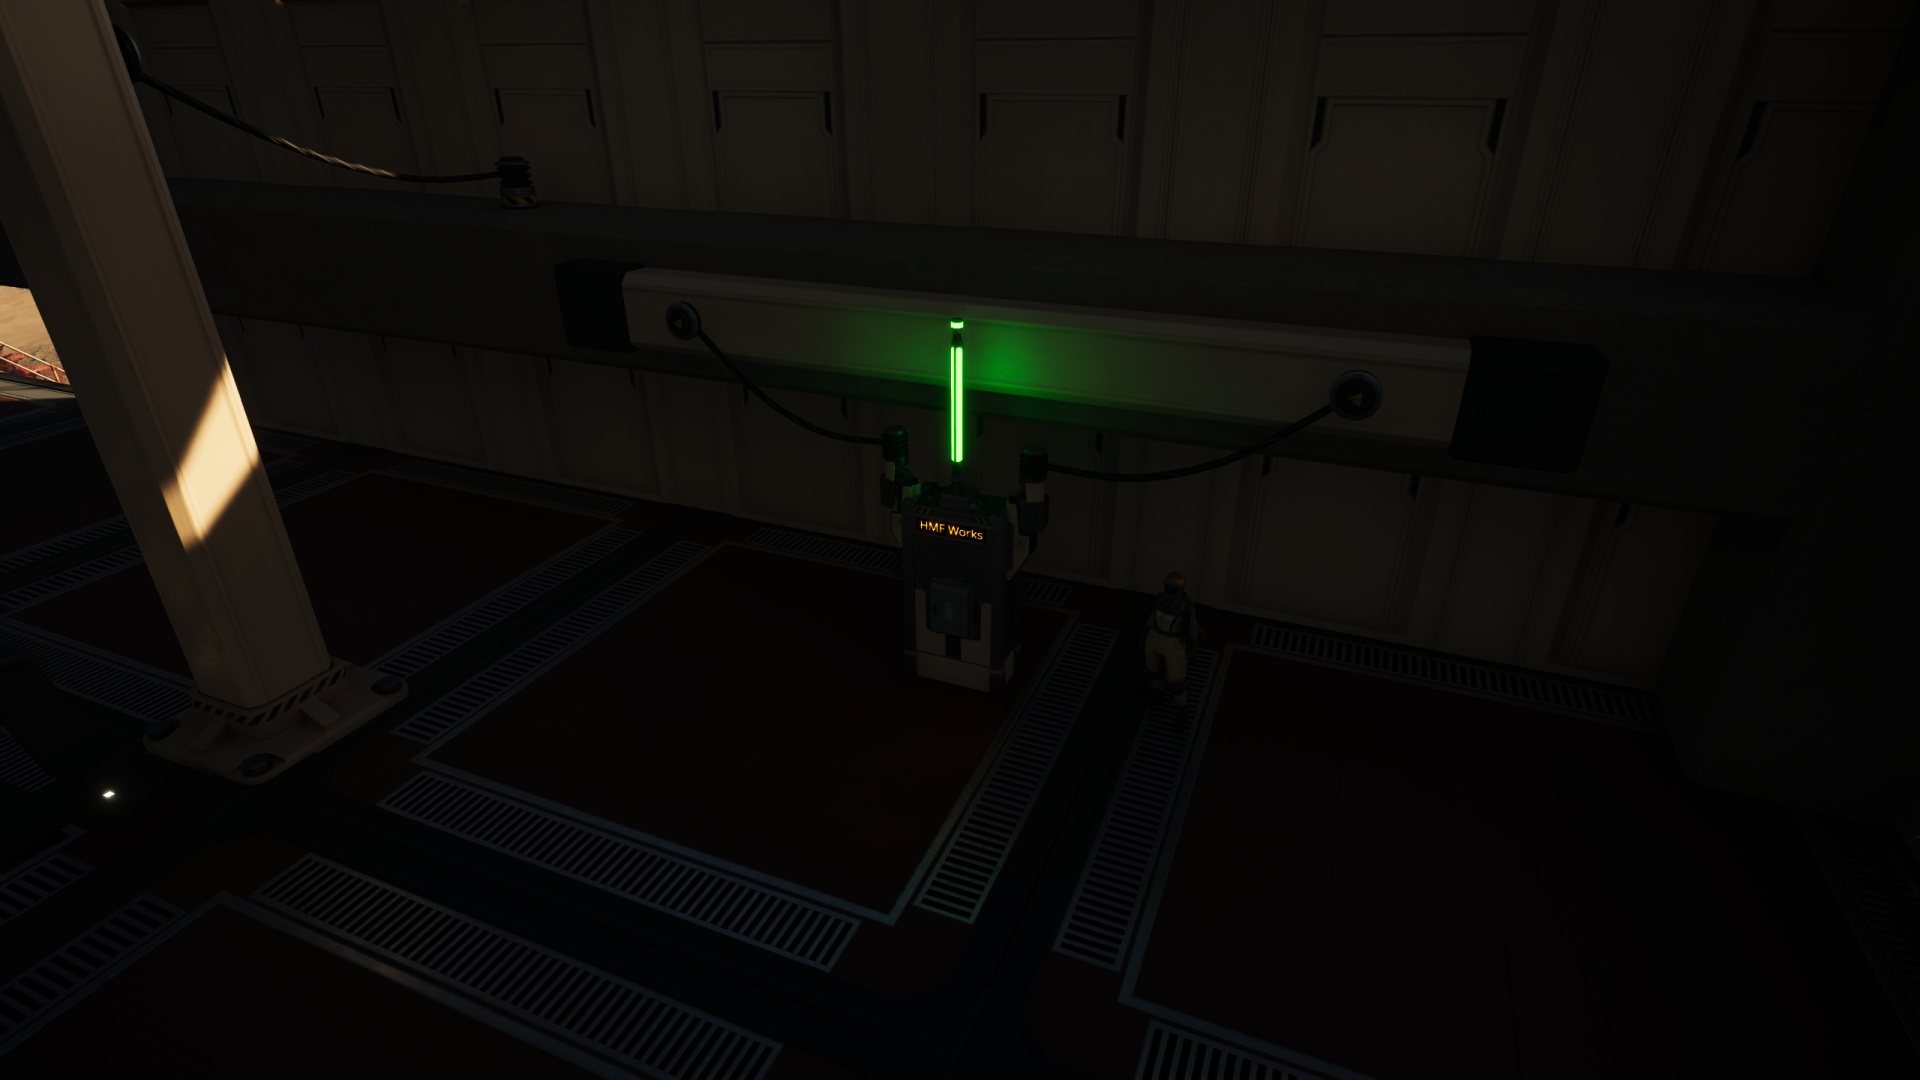
That last bit was aided greatly by the realization that I could a) hide a regular Power Pole inside of a length of Painted Beam and b) make a blueprint where that hidden Power Pole connected vertically to an under-floor power plug. That allowed me to supply the juice via the “belt spaghetti zone” underneath the machinery, saving me the trouble of building complicated concrete pillar arrangements to deliver power between floors or to dangle wires off of the personnel elevator on factory floor levels. (That would be unsightly!)

The trick with this blueprint is that I have to use the “vertical nudge” control to place it at the correct height such that the under-floor plug is actually under the floor where it belongs. This is a small price to pay for not having to manually build and run cable for this rig over and over again. Blueprints are great! Who knew?
Also, I utilized the personnel elevator’s ability to supply power in order to deliver juice to the logistics floors. Because why not?
Still on the subject of power, I’m also following my son’s advice and placing power switches at key supply points in these new “permanent” factory builds, first the Computer site (one controlling the Quickwire supply and one for the Computers themselves) and now this Heavy Modular Frame site. They’re just regular power switches for the time being but the goal is to replace them with the “priority” switches later on once available. At that point I’ll be able to toggle factories on and off from remote locations and decide which factories are allowed to fail to a powered-down state if I goof up my electrical grid somehow.
This does require that I avoid providing redundancy in power supply to these factories, but I think the results will be worth the trouble.
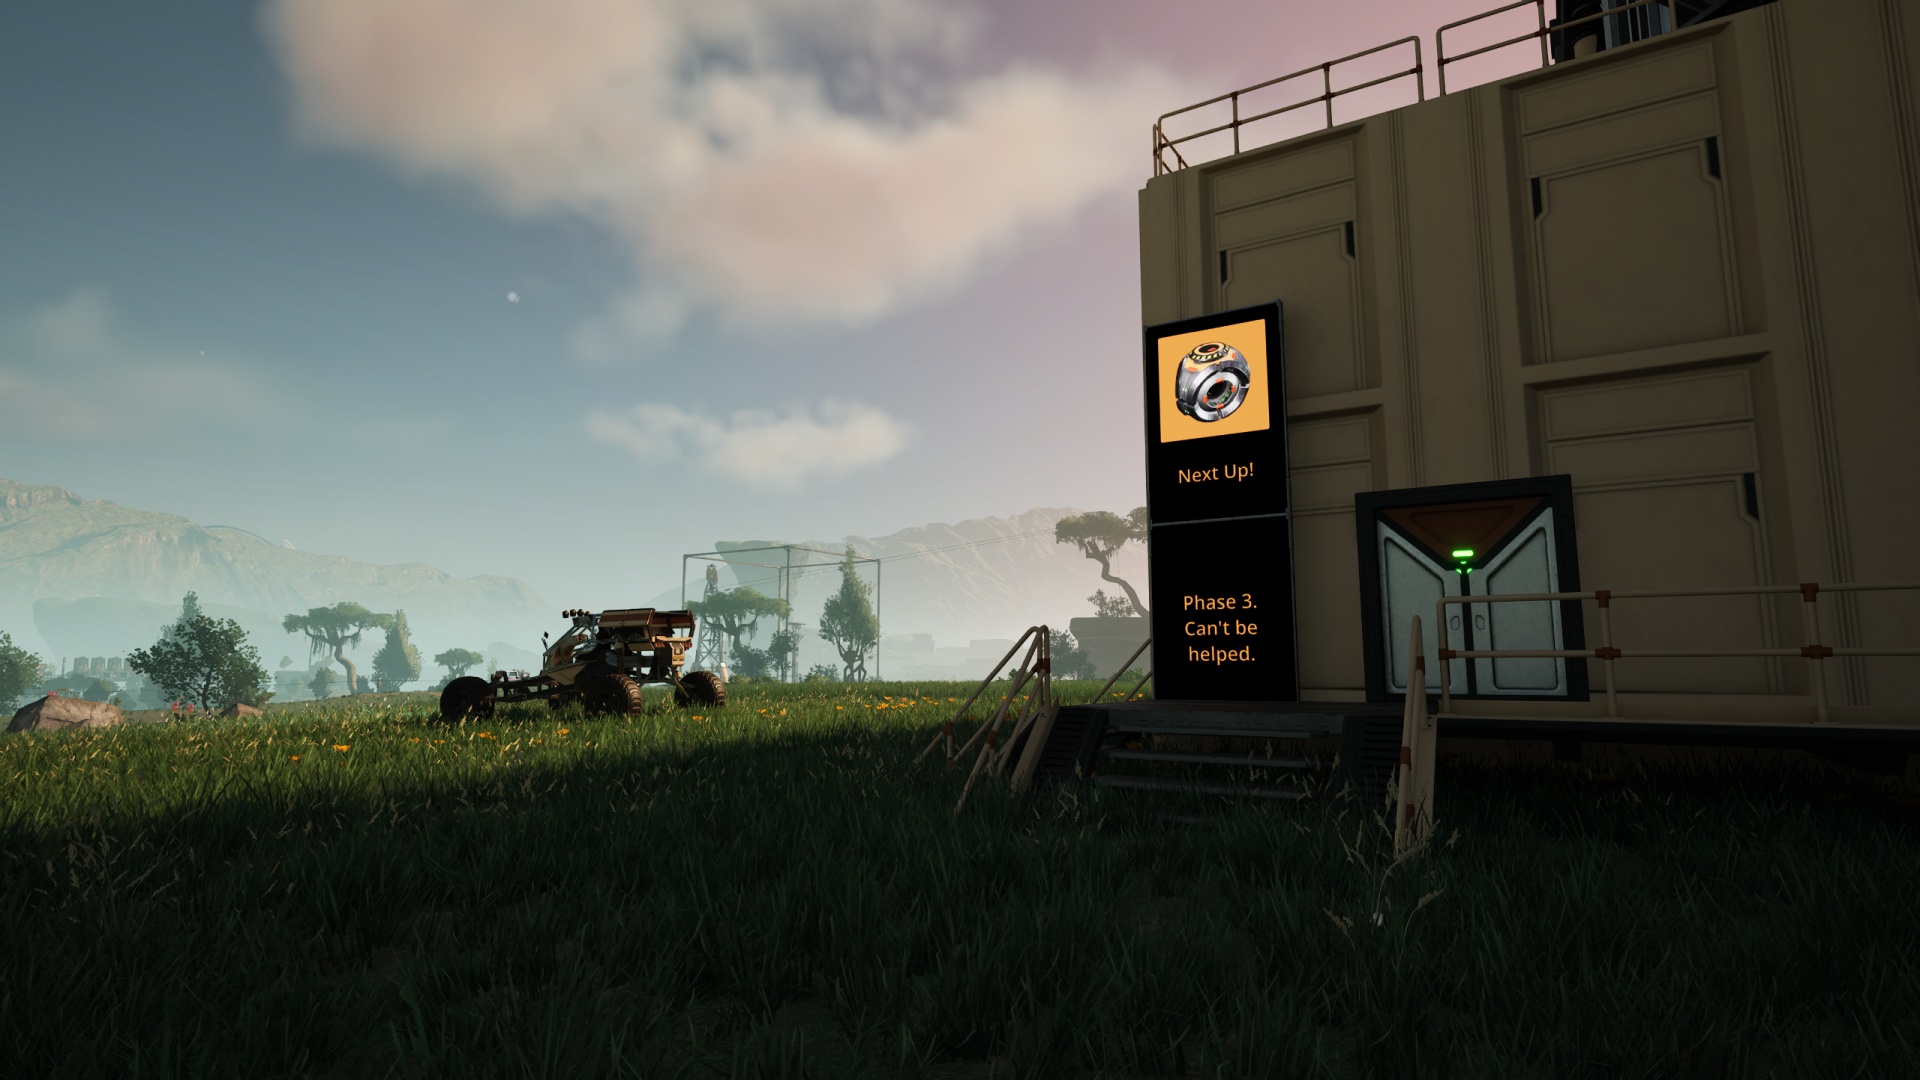
With that done, what’s next? Well… unfortunately I’m out of other options: I need to tackle the Phase 3 shipment products. On the upside, clearing that tedious hurdle will unlock access to aluminum products and, thus, the Hoverpack. Yay!

Comments
One response to “Satisfactory: Fully Walkable”
[…] the Designer space, and re-loaded the temporary blueprint on top of some concrete. Then I used my “hidden power pole” blueprint to supply power leads via the underfloor space and placed a conveyor belt floor hole and lift […]