It’s been a whole lot of years since I last owned a dining table.
I should explain.
When I moved out of the house, all those years ago, I moved into a townhouse with someone who already had a dining table, so I didn’t need to buy one. Then, when Vyx and I moved into the apartment nearly nine years ago, there wasn’t enough room to justify the wasted space when there was a perfectly functional “bar counter” setup that we could just sit a couple of barstools in front of. Which is what we did!
And then we moved. After nearly a year in this house, which has a similar “bar counter” but without the convenient overhang to make barstool sitting practical, it was time to procure a solution.
And so, here we are.
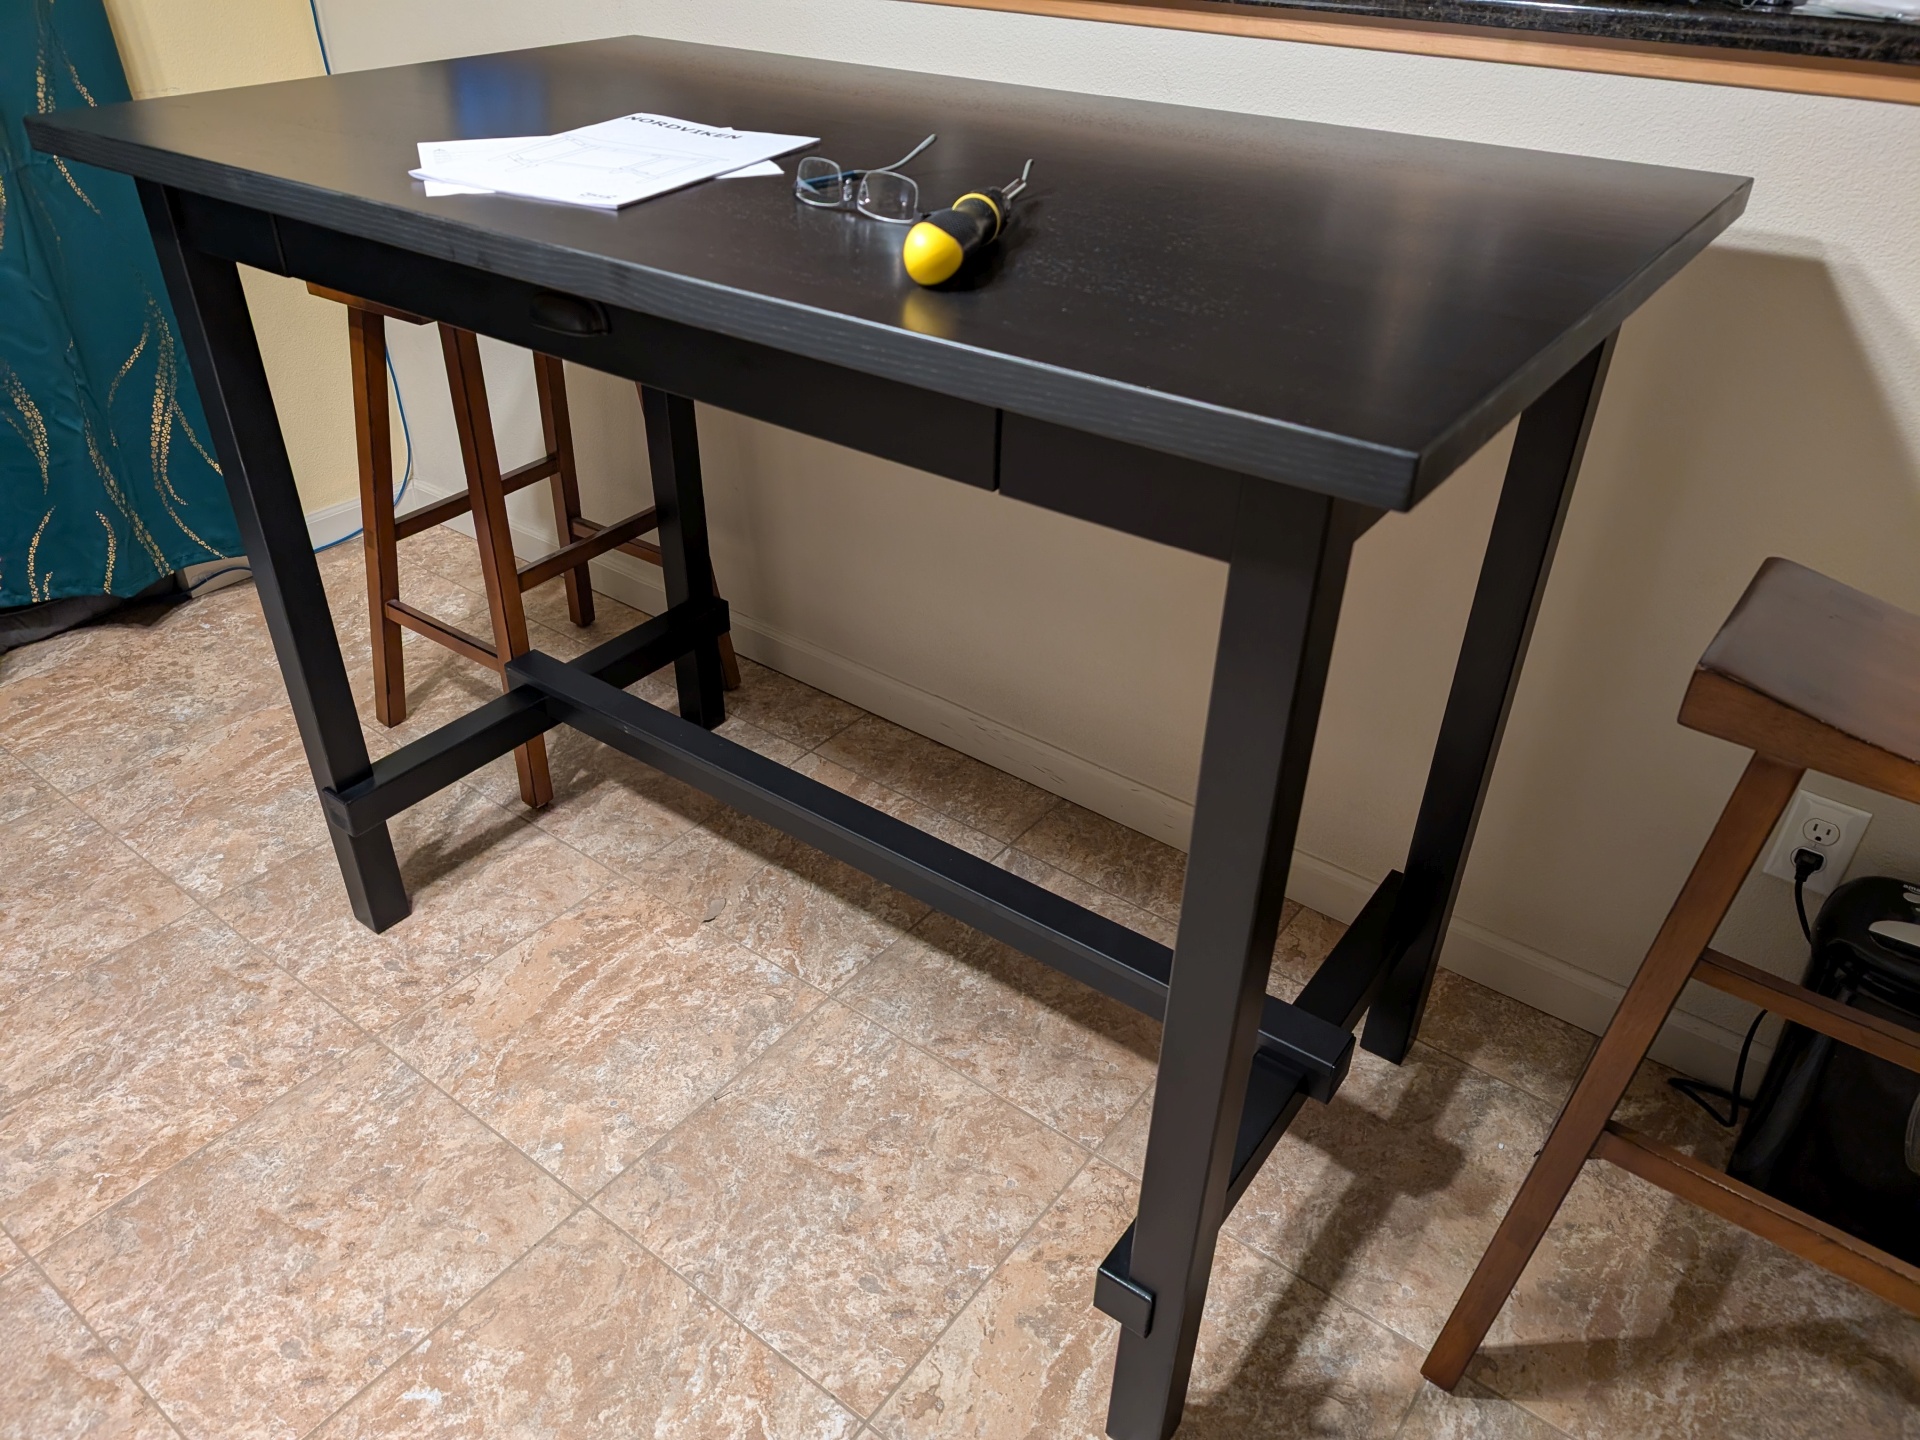
Of course I didn’t just buy a table and have it delivered. I bought two flat, heavy boxes with table parts inside, then assembled the table myself over the span of a couple hours. Hail to the glory that is Ikea, provider of furniture-as-puzzle-challenge.
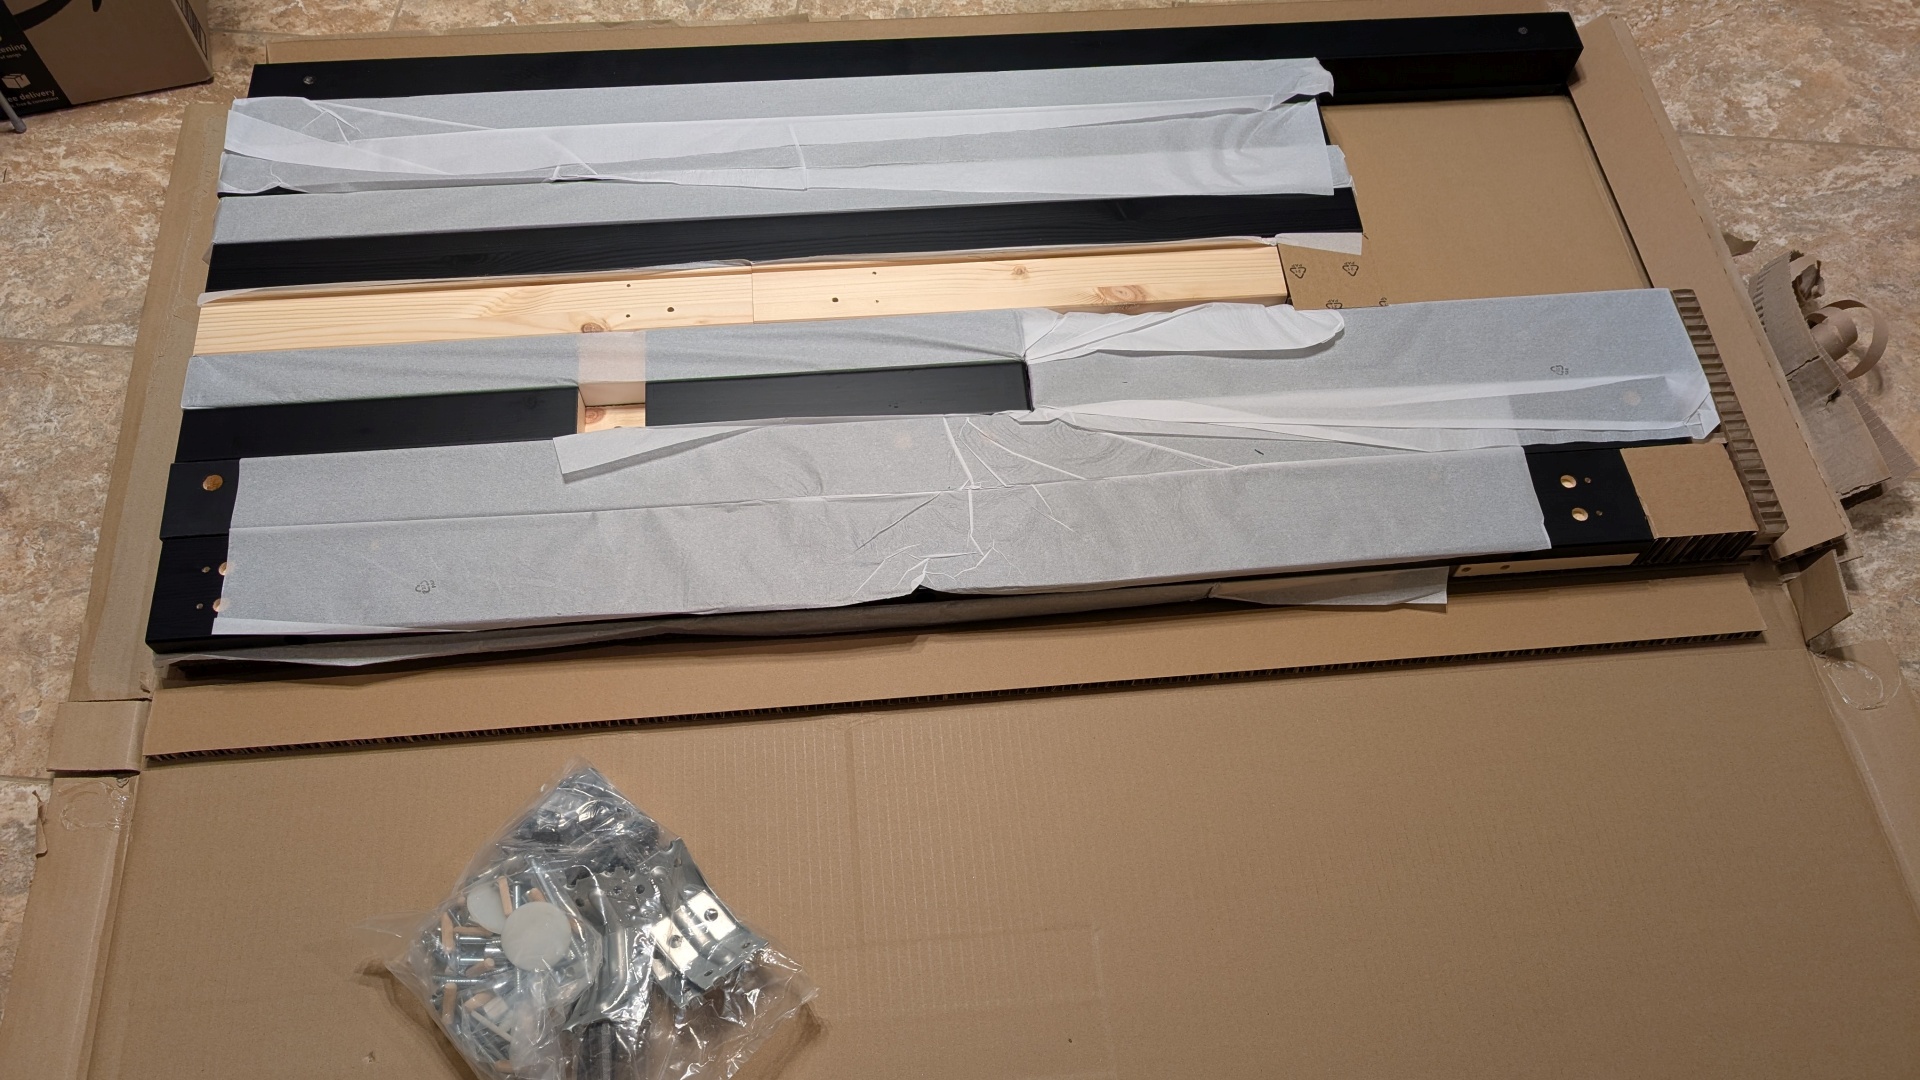
We’re not new to this sort of thing. There’s a lot of Ikea-sourced stuff in this house, some of it mine and some of it hers. Making sense out of the instruction diagrams is child’s play… most of the time, anyway.
The new twist this time around involved weird little round plastic bits with metal bits inside which could rotate and spin freely. It took until most of the way through the project before their purpose was revealed:
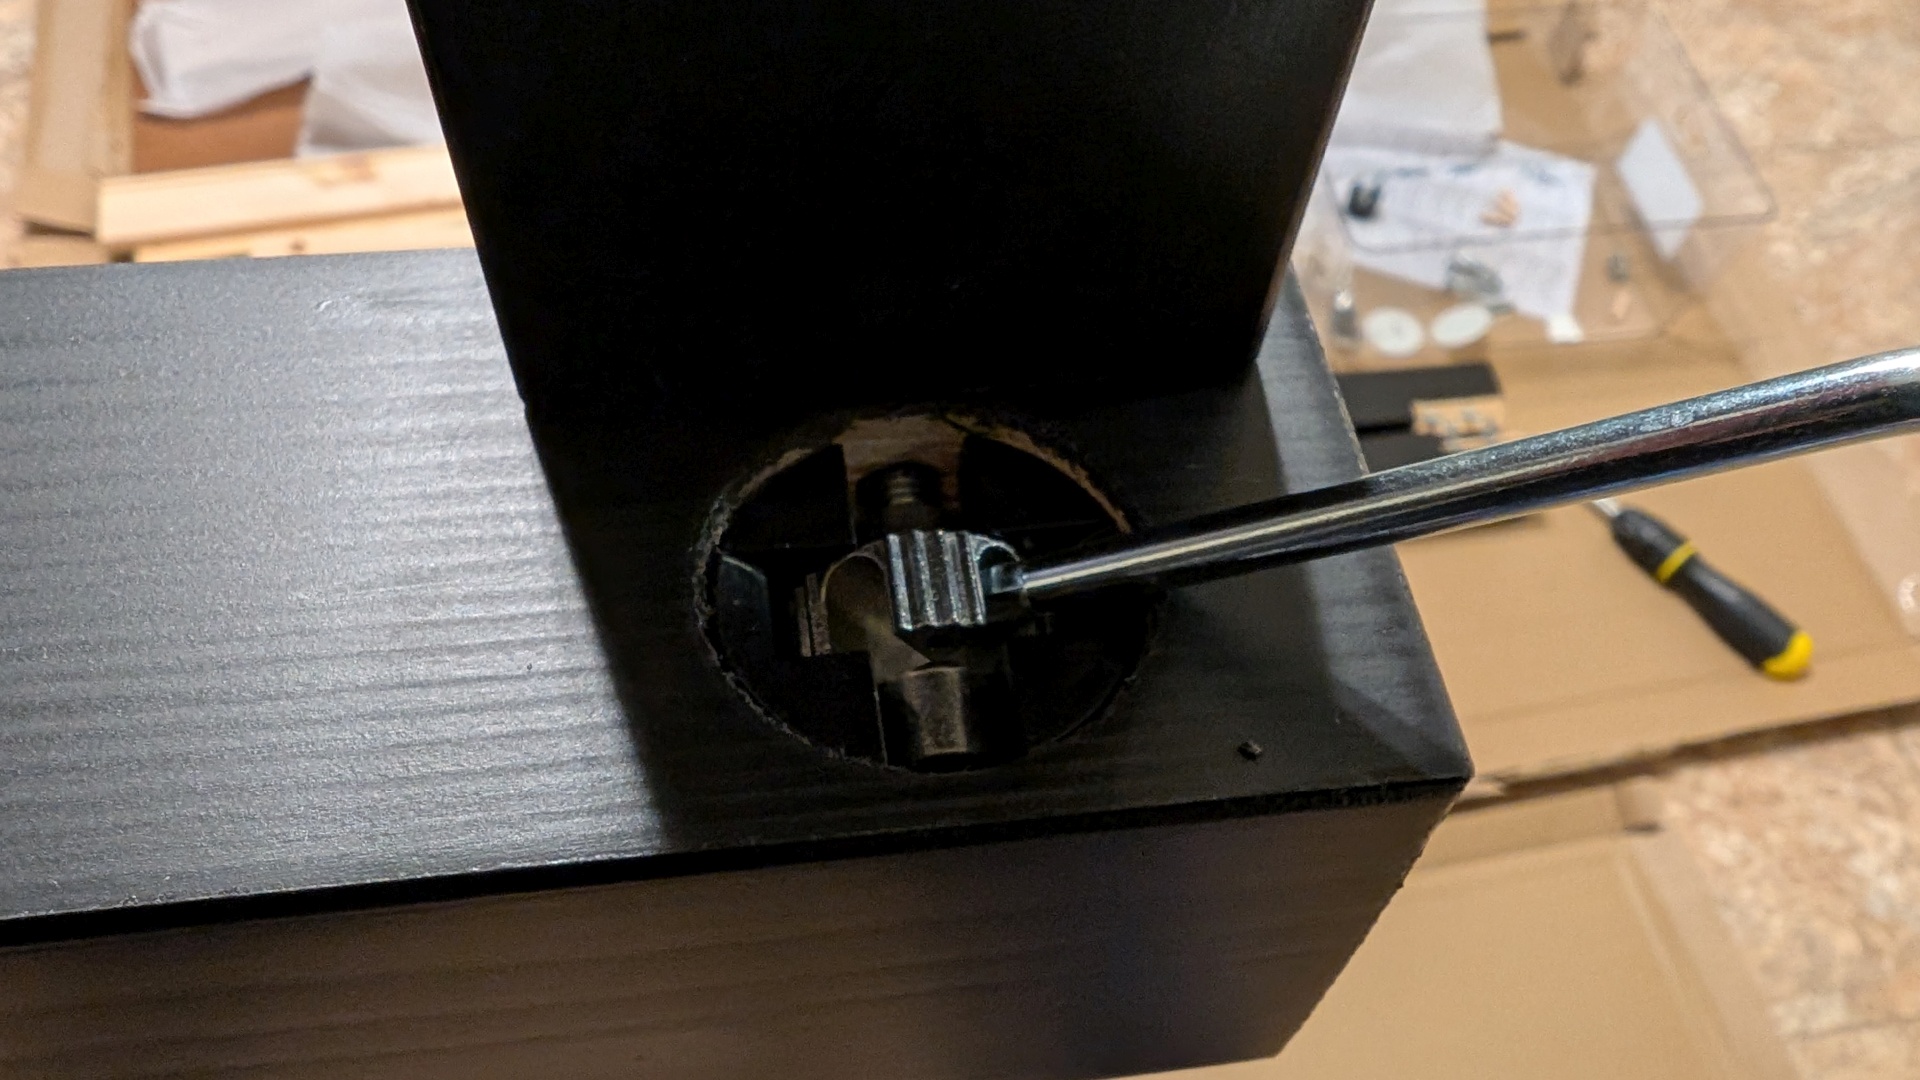
I suppose that’s one way to attach the shorter crosspieces to the legs. So the trick there is that you rotate the plastic piece to align with the screw threads coming out of the table leg, then hand-spin the metal bit (which is essentially a complicated nut) until you can’t hand-tighten it anymore, after which you take the Allen wrench (Ikea always provides one!) and ratchet the thing into place, a quarter-turn at a time, until it’s all flush and snug.
This was the most time-consuming part of the whole two-hour deal, because there’s just no way to make that part go any faster and there are four of them to deal with.
Ah well. At least we can sit down for dinner again. My feet will thank me.