To be clear: There are videos on YouTube which can show you how to do this, but I don’t like scrolling back and forth through a video to tease out the details of a process. If you’re like me in that regard, here’s a tutorial for making a single-track train spiral structure in Satisfactory.
Note that you can (and should) play around with materials and other design elements. Maybe you want sign-based lighting on yours? Sweet, go for it!
Let’s get started.
You’ll need the Blueprint Designer Mk2 to get the “outer support pillar” design that I went for. Given that you need Tier 6 to unlock both trains and the Mk2 Designer, this shouldn’t be an issue. If you have the Mk3 Designer in the late game you can play around with getting two sets of rails into place but that’s beyond the scope of this particular document. (I’m not there yet, in other words.)
The Blueprint
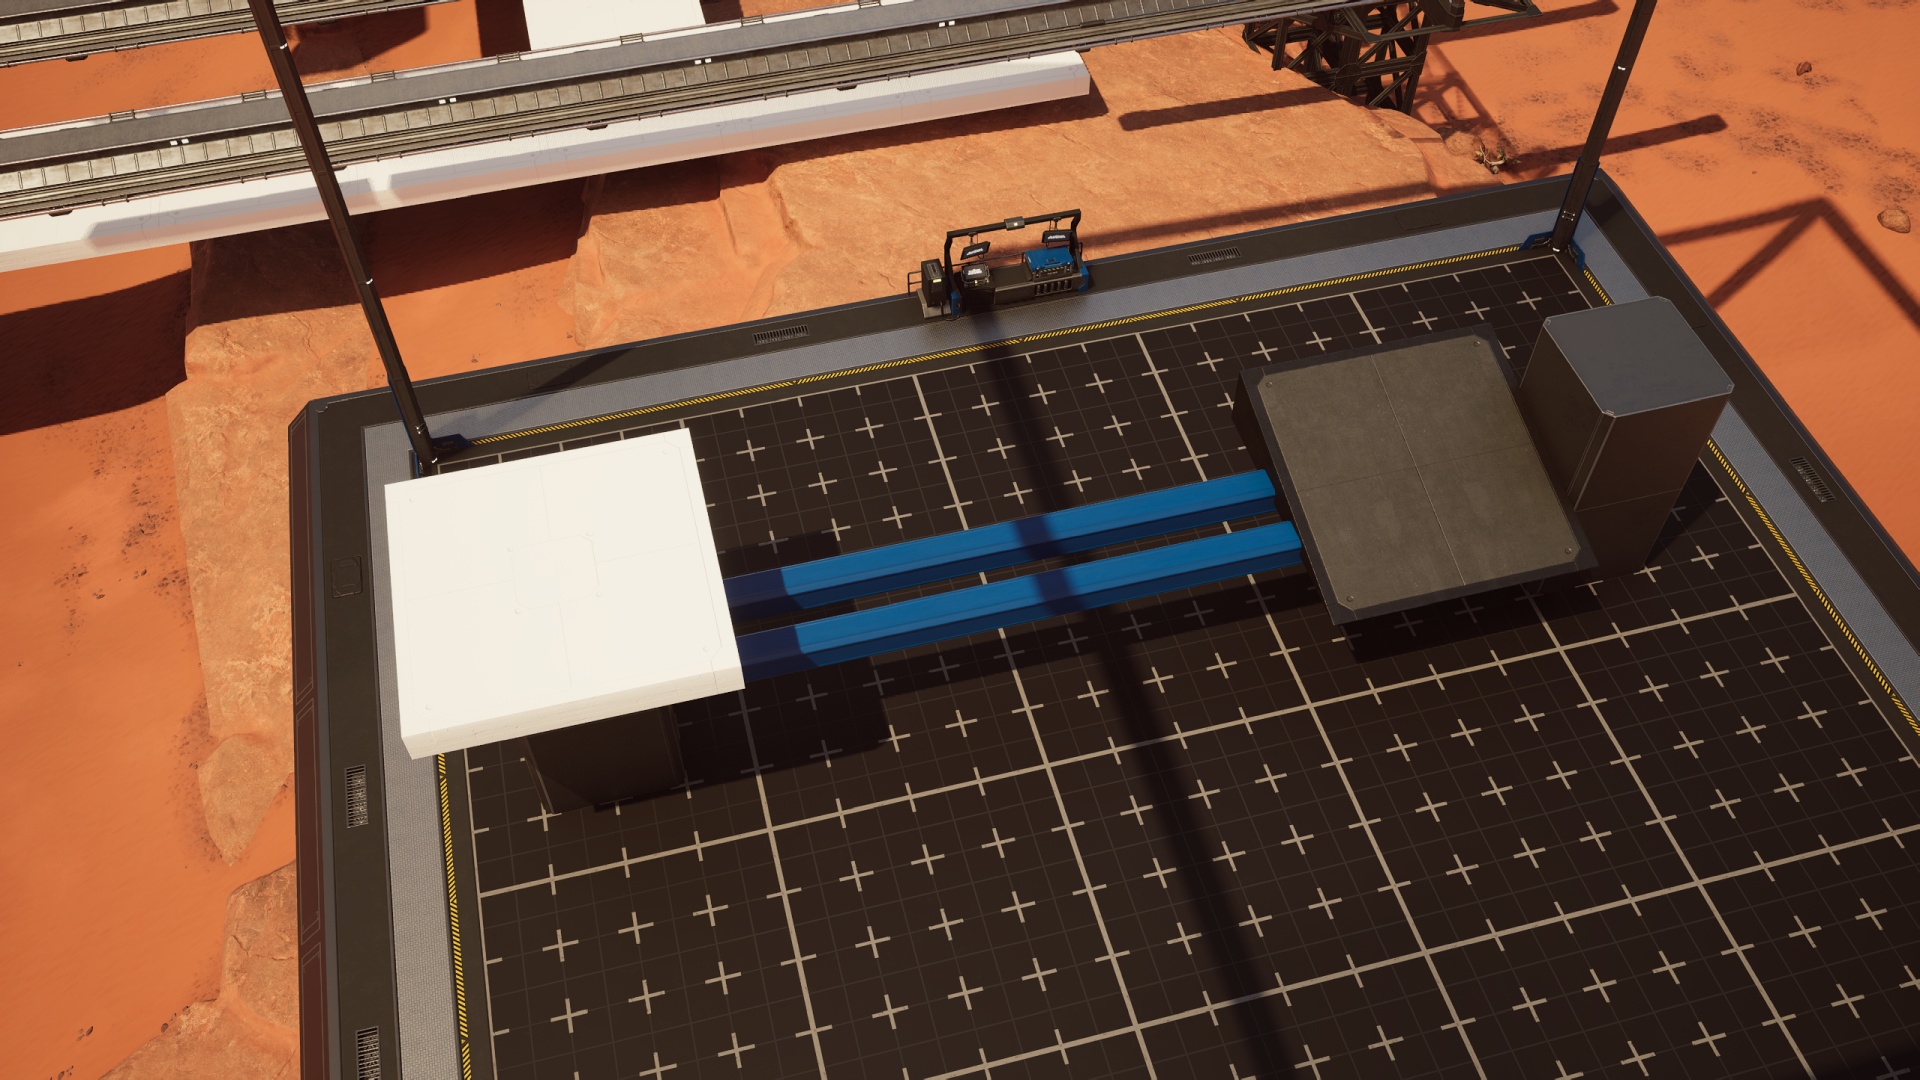
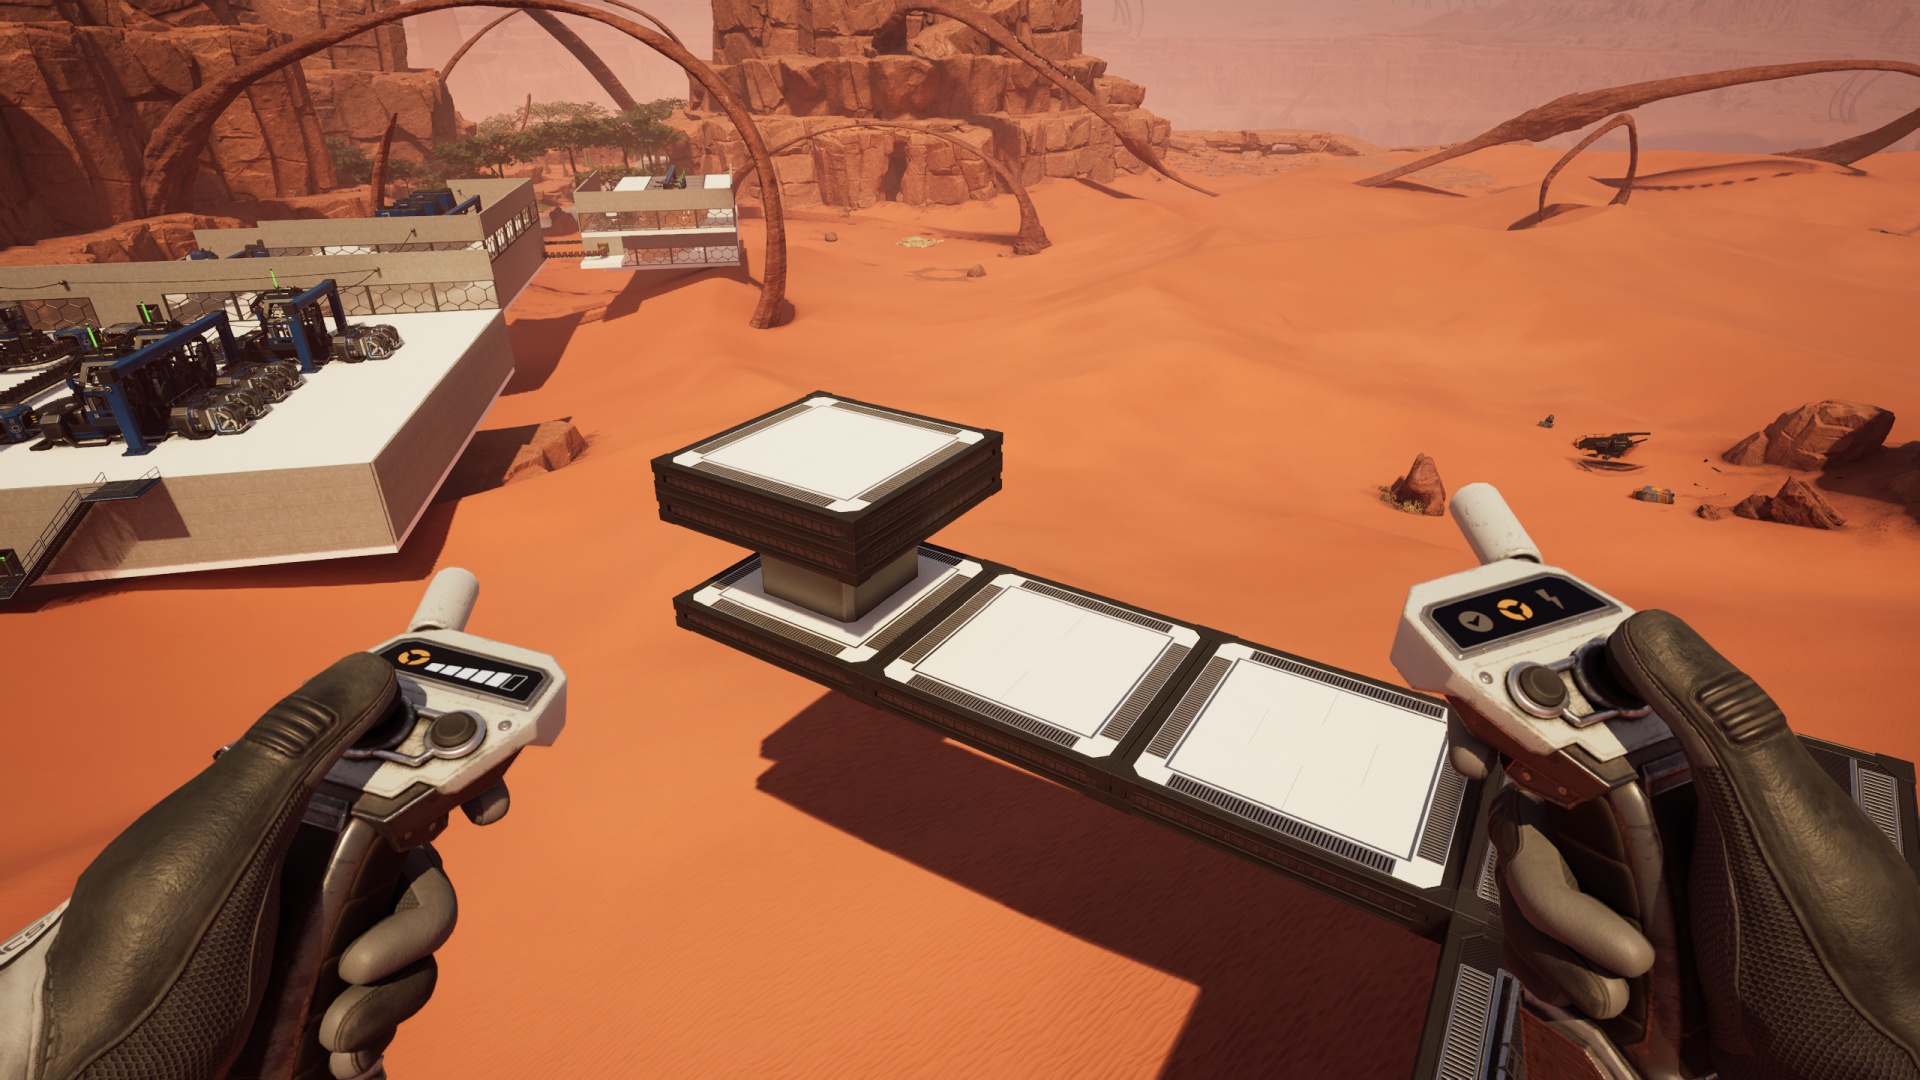
Along one “edge” of the design space, place a steel pillar in the center of one of the foundation guide spaces. Three spaces to the right, place an 8m foundation block, then set a 2m single ramp piece angling “upward” (relative to the path of the incoming rail line) on top of that. Flush against the 8m block, place another steel pillar.
Run a couple of beams (painted or steel, your choice) from the center of each steel pillar to the center of the other, offset such that there’s a bit of a gap between them. Put another way, position each of them just off from center. The start/end points should “snap” fairly easily.
Add another steel pillar each on top of the existing steel pillars, and get rid of the 8m foundation block. Now for a slightly tricky bit: On top of what will be your “center” pillar, the one three “tiles” away from the ramp piece, place a 1m foundation tile… then snap another one of those just underneath of that one, clipping through the steel pillar. Get rid of the topmost 1m tile once you’ve done this.
What for, you ask? This is our starting point for adding the foundations we’ll need in order to place each iteration of the blueprint as we spiral skyward.
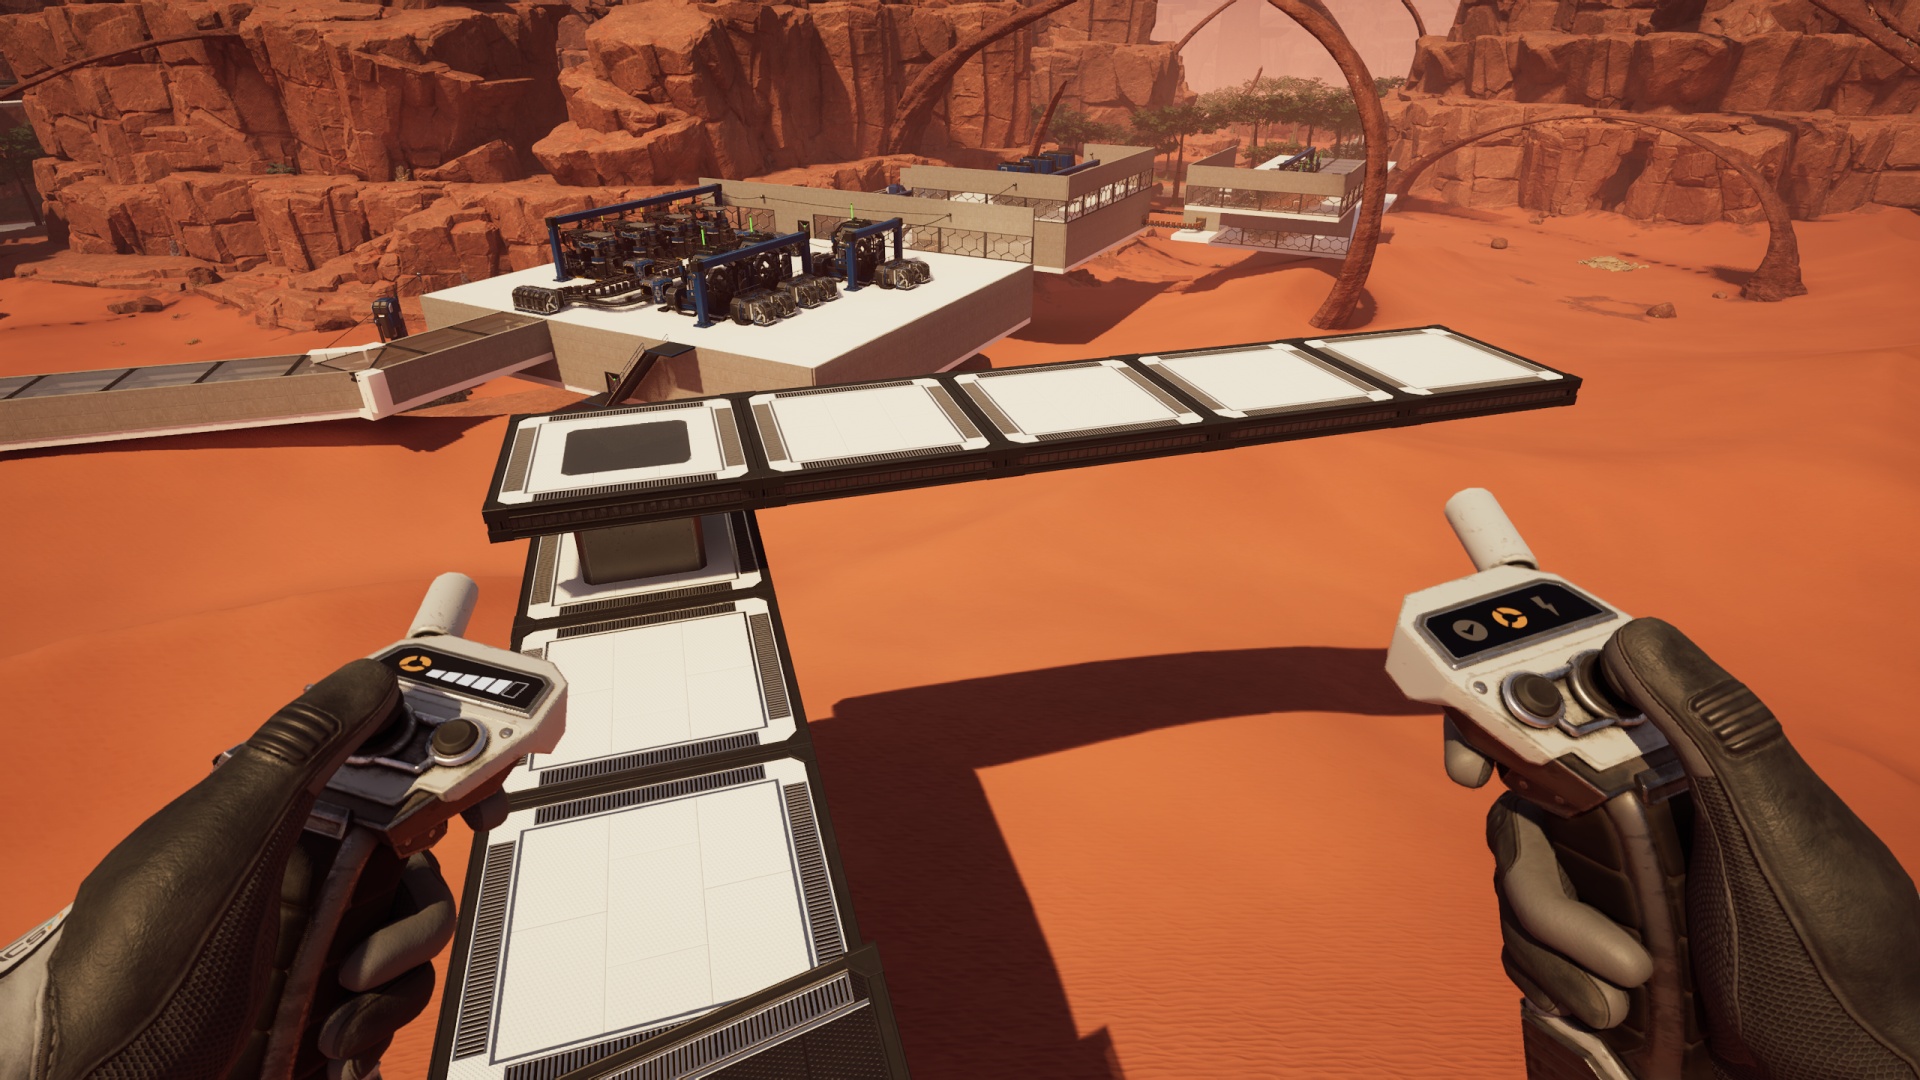
If you want decorative bits, this is the time to add them in. (For example, I applied the Carbon Steel finish to my ramp piece.) Then save your new blueprint.
NOTE: Before you clear the designer, this might be a good time to re-add the 8m foundation tile so you can remove the 2m ramp then put it back facing the other direction so you can save another copy of the blueprint, resulting in “up” and “down” options. Or “left” and “right” depending on how you want to look at it. It’s all up to you.
The Upward Spiral
Once you get to the point where you want to go majorly vertical with your train line, and as long as you have a 9×9 tile sized horizontal space to work with, it’s time to get building.
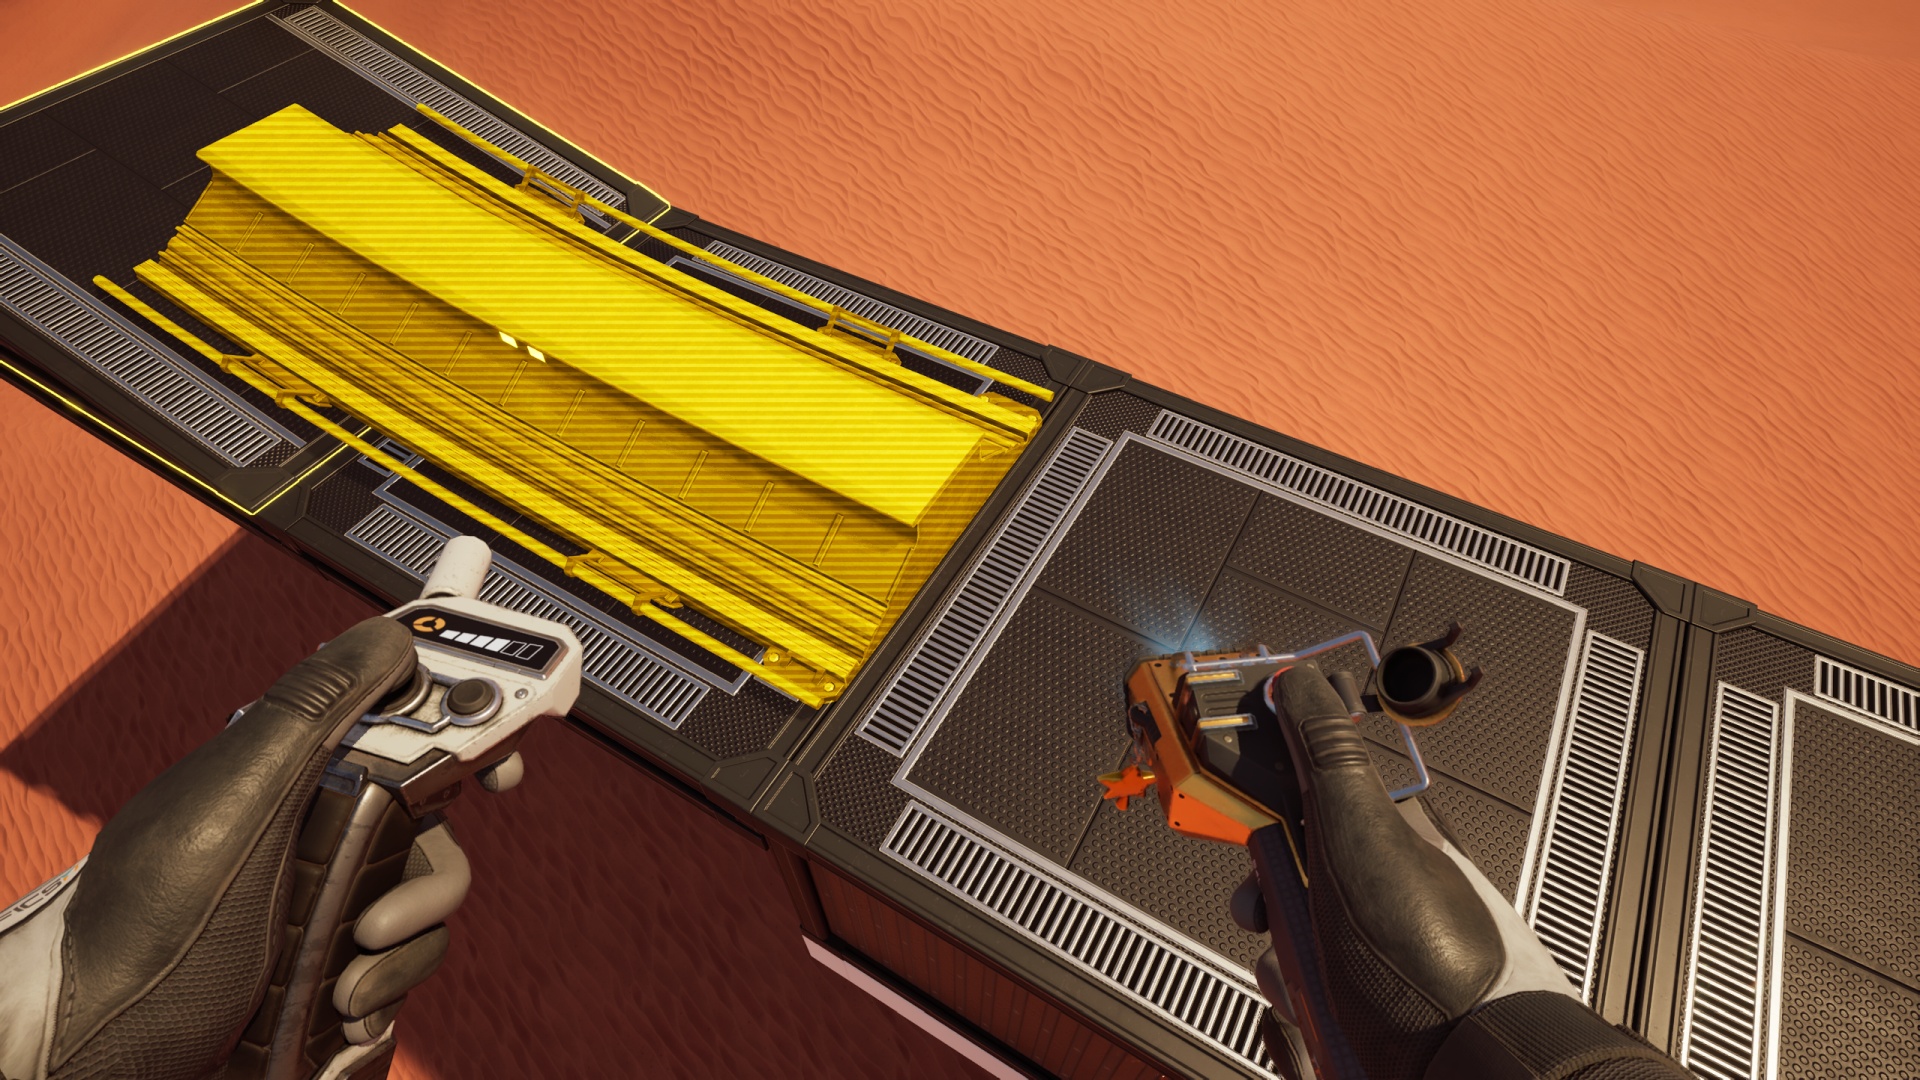
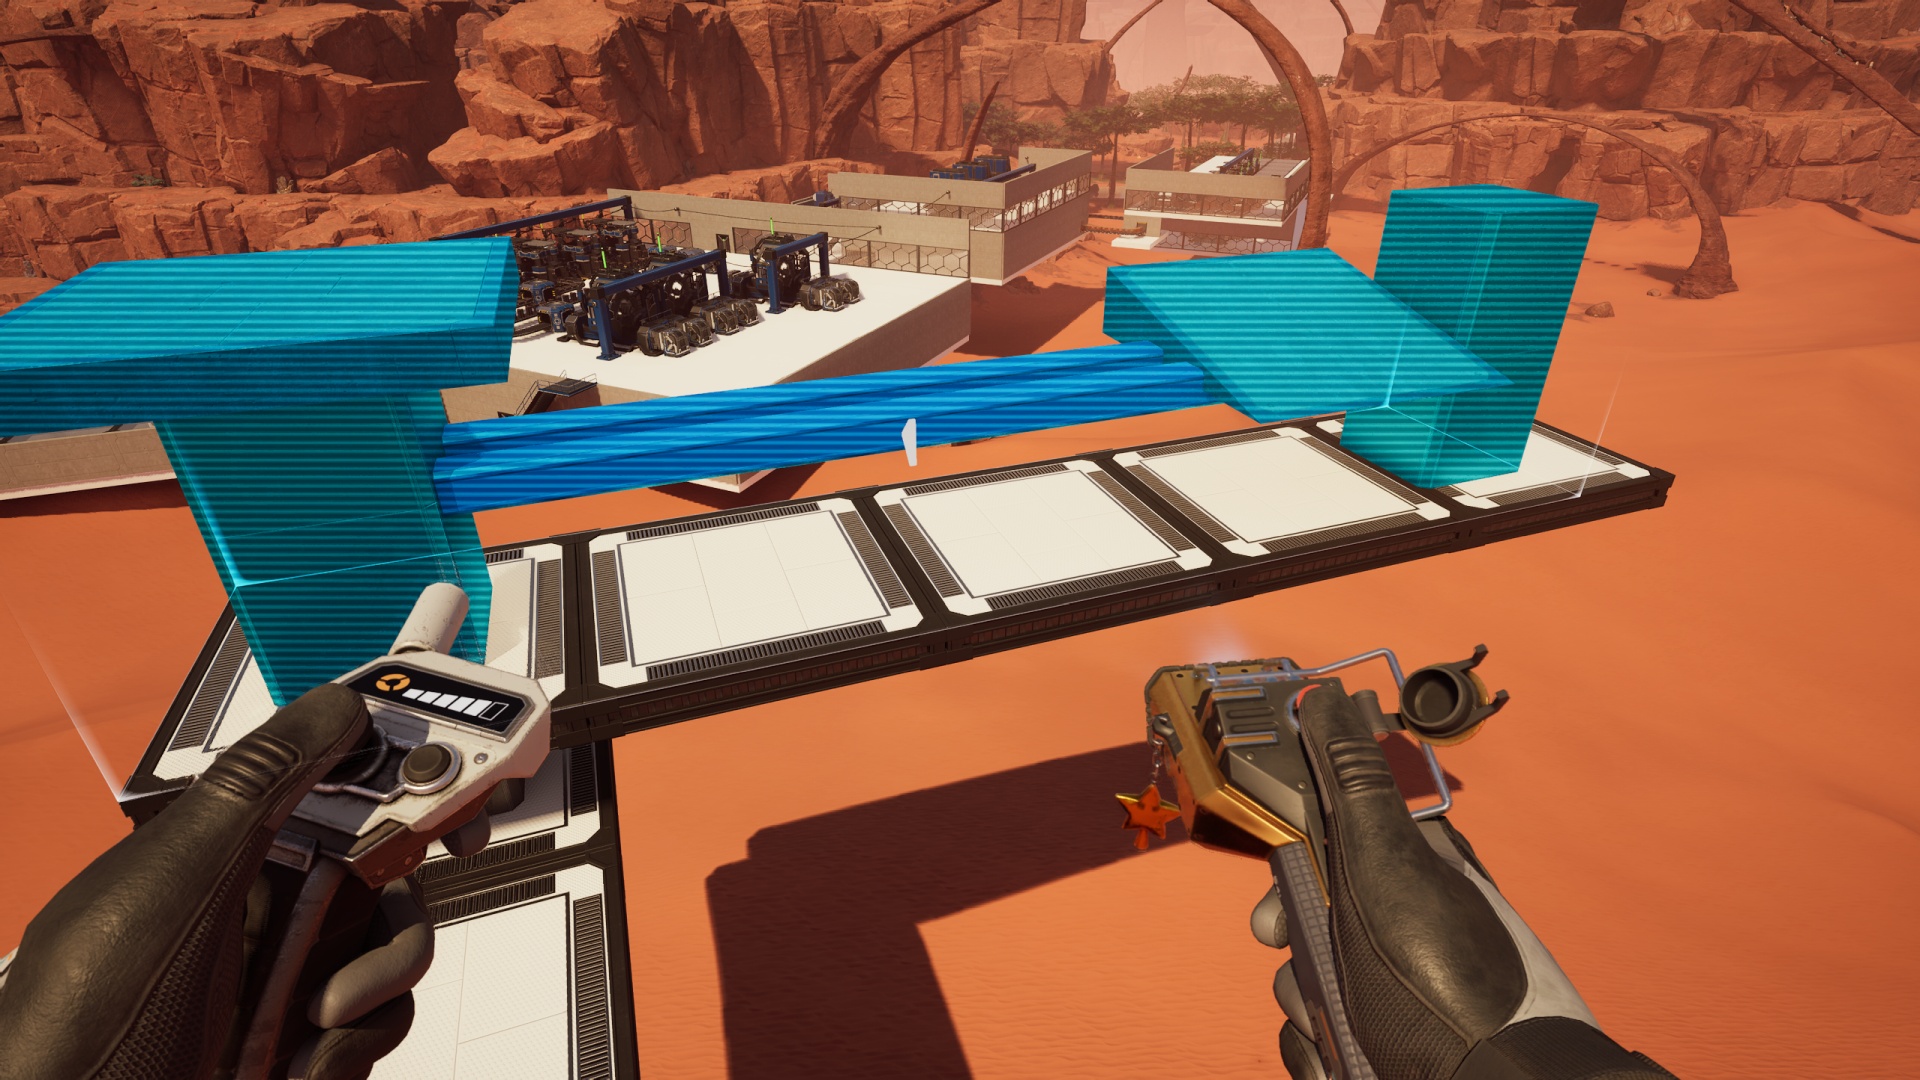
Find where you want to start your upward climb, preferably at the end of some sort of straight stretch. Get a couple of 1m foundation tiles down and place a 2m ramp angled “upward” at the end. Start a rail segment at the halfway point of that ramp tile and lead it back toward your incoming rail piece, finalizing placement at the junction between the two foundations heading into that ramp.
Anchored to the foundation under the starter ramp, place three 1m tiles to the side.
NOTE: For the purpose of this tutorial I’m using the “anti-clockwise” or “left” curving version of the blueprint piece, but you can just flip this the other direction using the other blueprint version you saved earlier. (You did save both versions, right? Right.)
Place one (1) steel pillar in the center of that third tile, then do the same trick that you did in the Blueprint Designer: Set a 1m foundation on top of the pillar, snap another one just below that so it’s clipping through the pillar, and delete the topmost foundation.
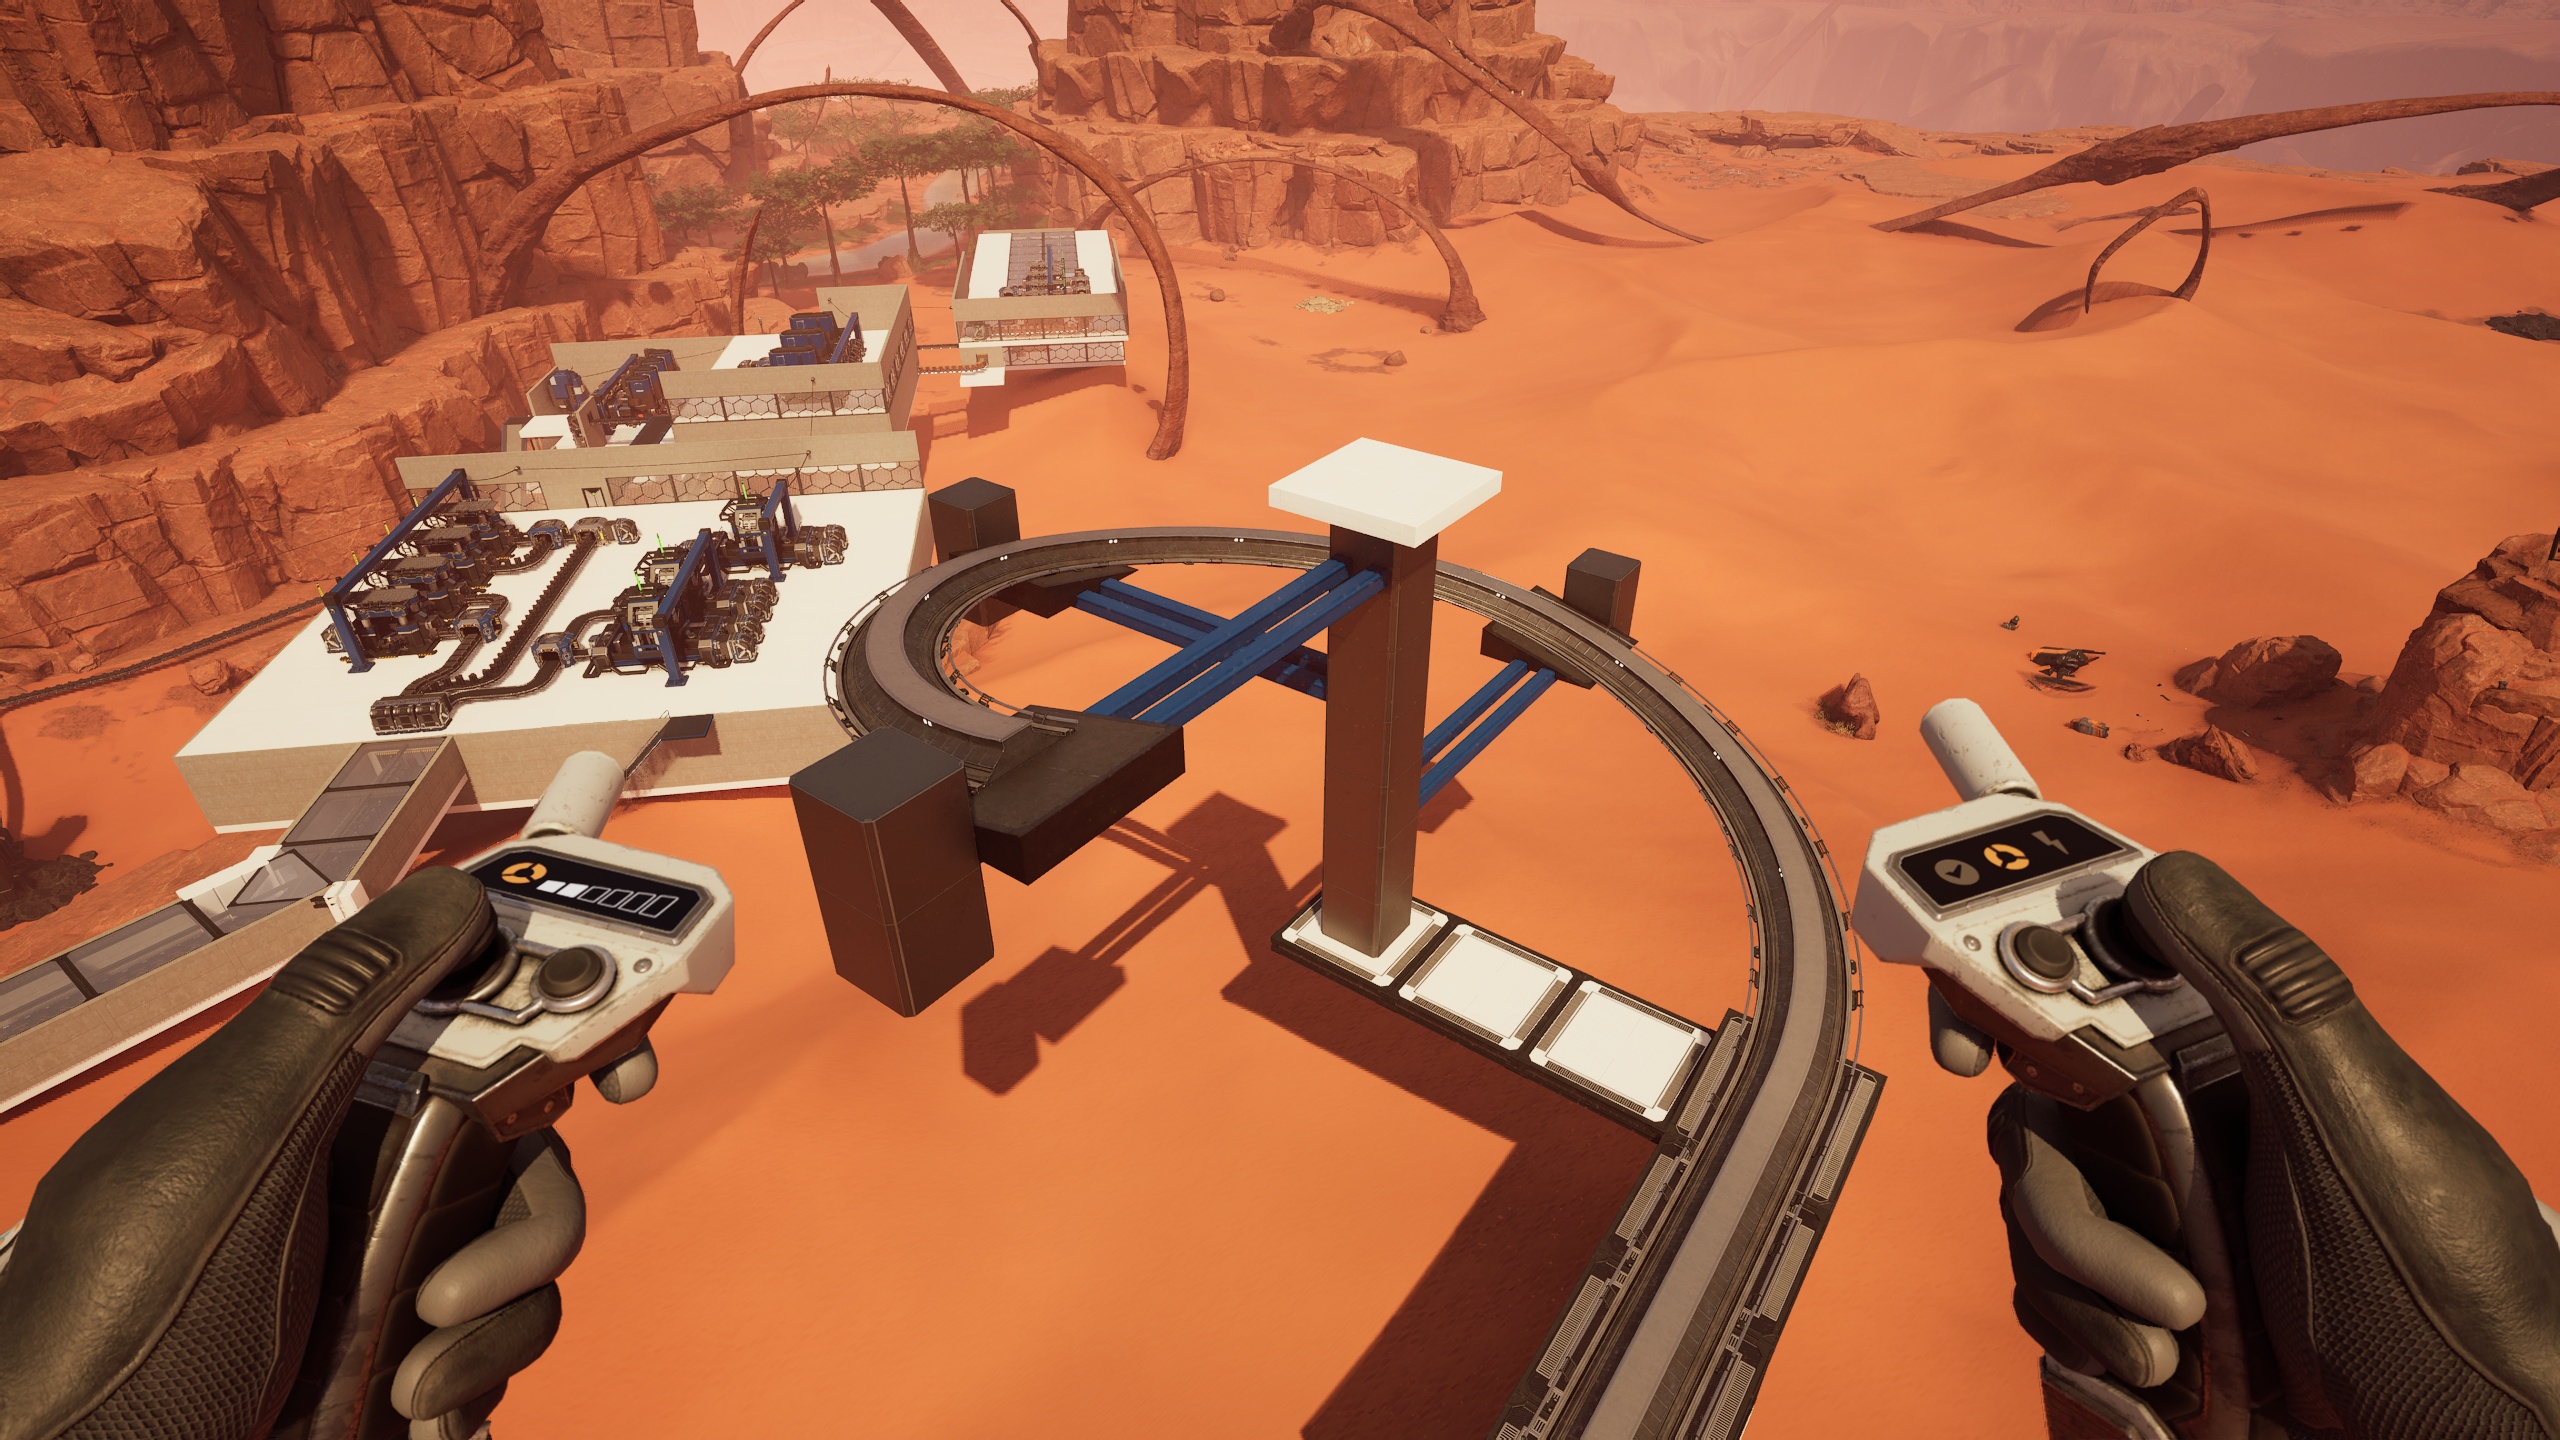
And from here it becomes super easy. For each “quarter turn of the screw” you’ll do these things:
- Place four 1m foundation tiles to the side of the guide foundation on the central pillar in the direction where you need to add the next blueprinted piece along the spiral.
- Place the blueprinted design such that the central pillar extension is aligned properly and that the ramp faces the correct direction.
- Remove all five of the 1m foundation tiles at this level of the spiral.
- Join up the rail segments, making sure to snap to the center of each 2m ramp foundation tile.
Lather, rinse, repeat.
Now… how to exit the spiral when you reach the desired elevation is up to you. You’re a smart pioneer, I’m sure you have ideas! I wouldn’t want to take away all of your fun, now would I?
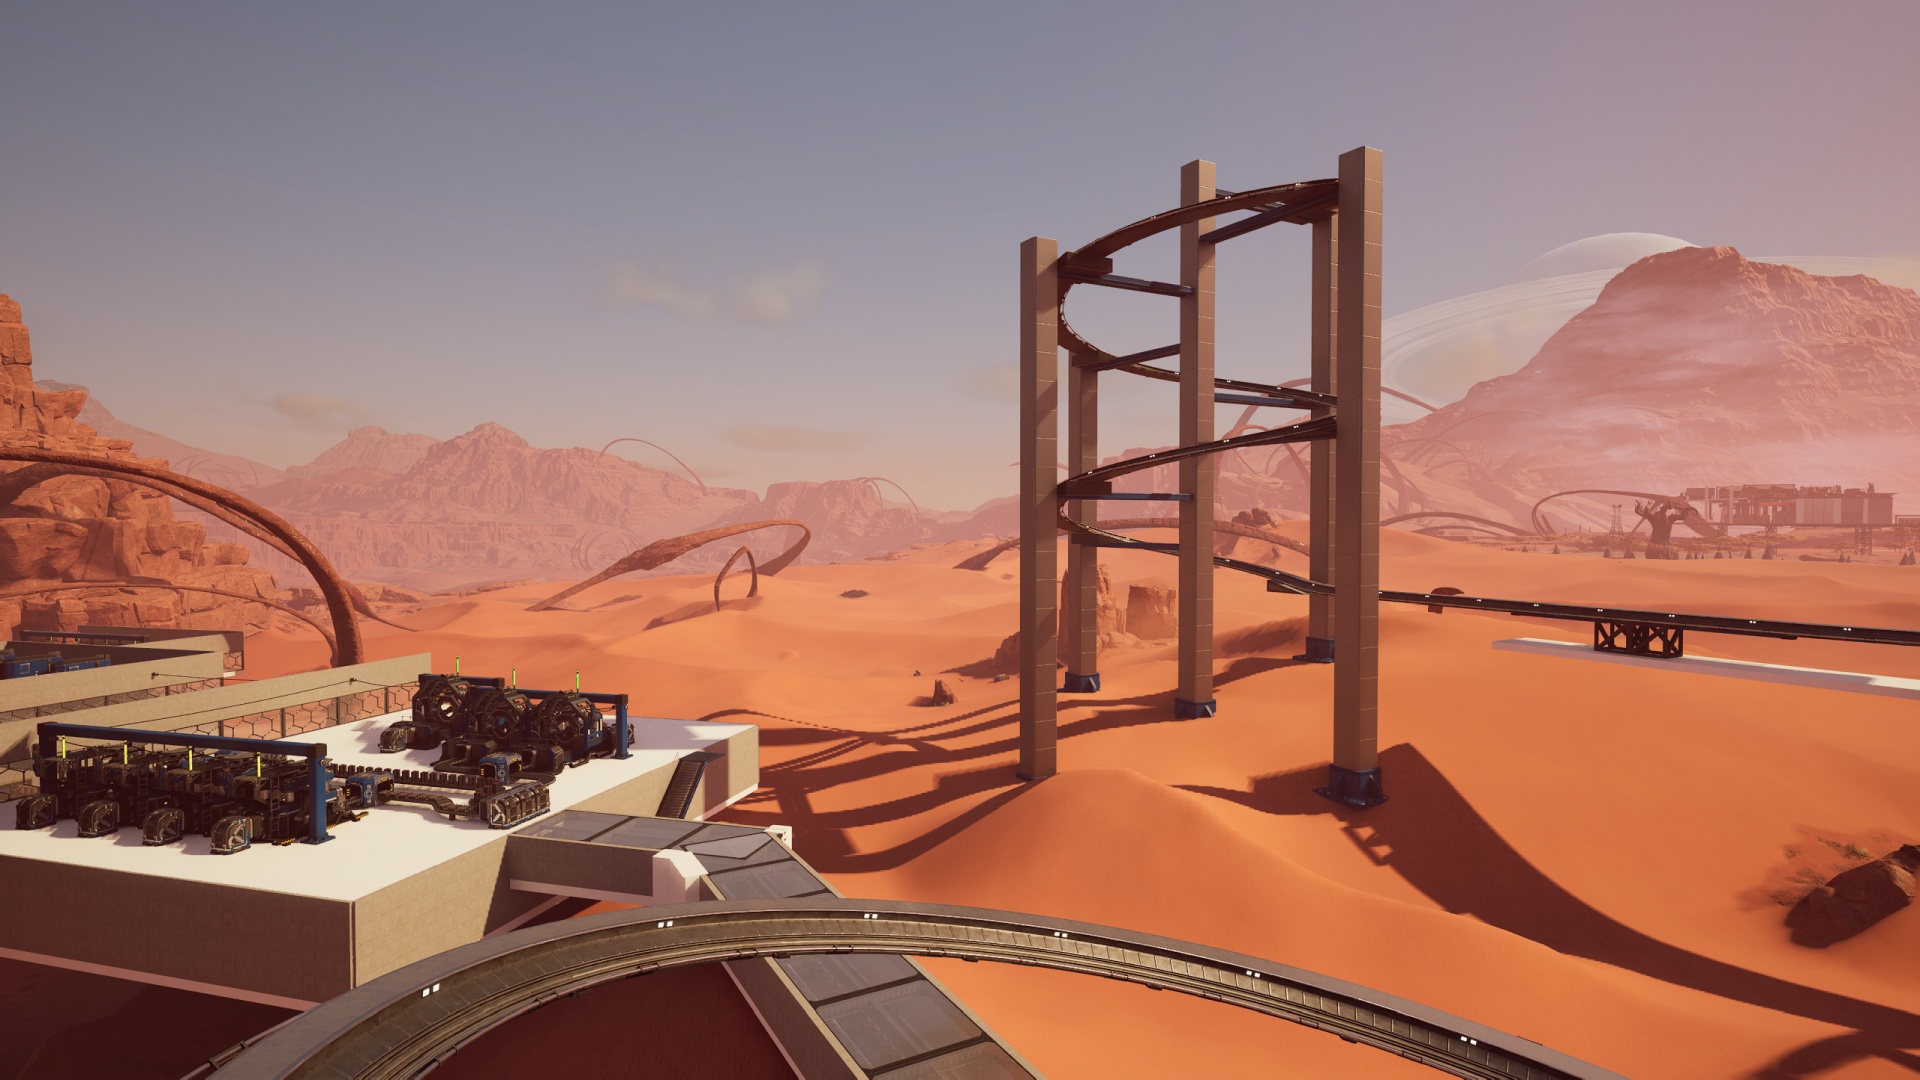
This would be an excellent time, however, to make sure all the extraneous foundations are removed, then you can connect all the steel pillars and “support” them with ground-level fixtures as demonstrated by the image at the top of this document.
The fact that I performed all of this testing, building, and documentation in the dune desert is no accident: I intend to use rail power to deliver water from the high oasis to my nearby nuclear power facility. We’ll see how it all goes once I have the facility built… provided all goes well. Wish me luck!